CapCut login problems: Google, TikTok, email, PC and QR fix
Use the right account method and fix common access problems without sharing sensitive credentials.
Read guide → By Rahul Verma·
Looking for a CapCut watermark remover? First identify where the mark comes from. It may be the default CapCut ending clip, a template or premium asset, or a watermark already embedded in footage that you do not own. The safest fix depends on that source.

A small logo at the end of a project is different from a watermark embedded inside a source video. A template may also include a branded ending or a premium element that changes the export experience. Before using any CapCut watermark remover tool, confirm that the footage and logo belong to you or that you have permission to edit them. Do not remove a creator’s ownership mark from someone else’s content and publish it as your own.
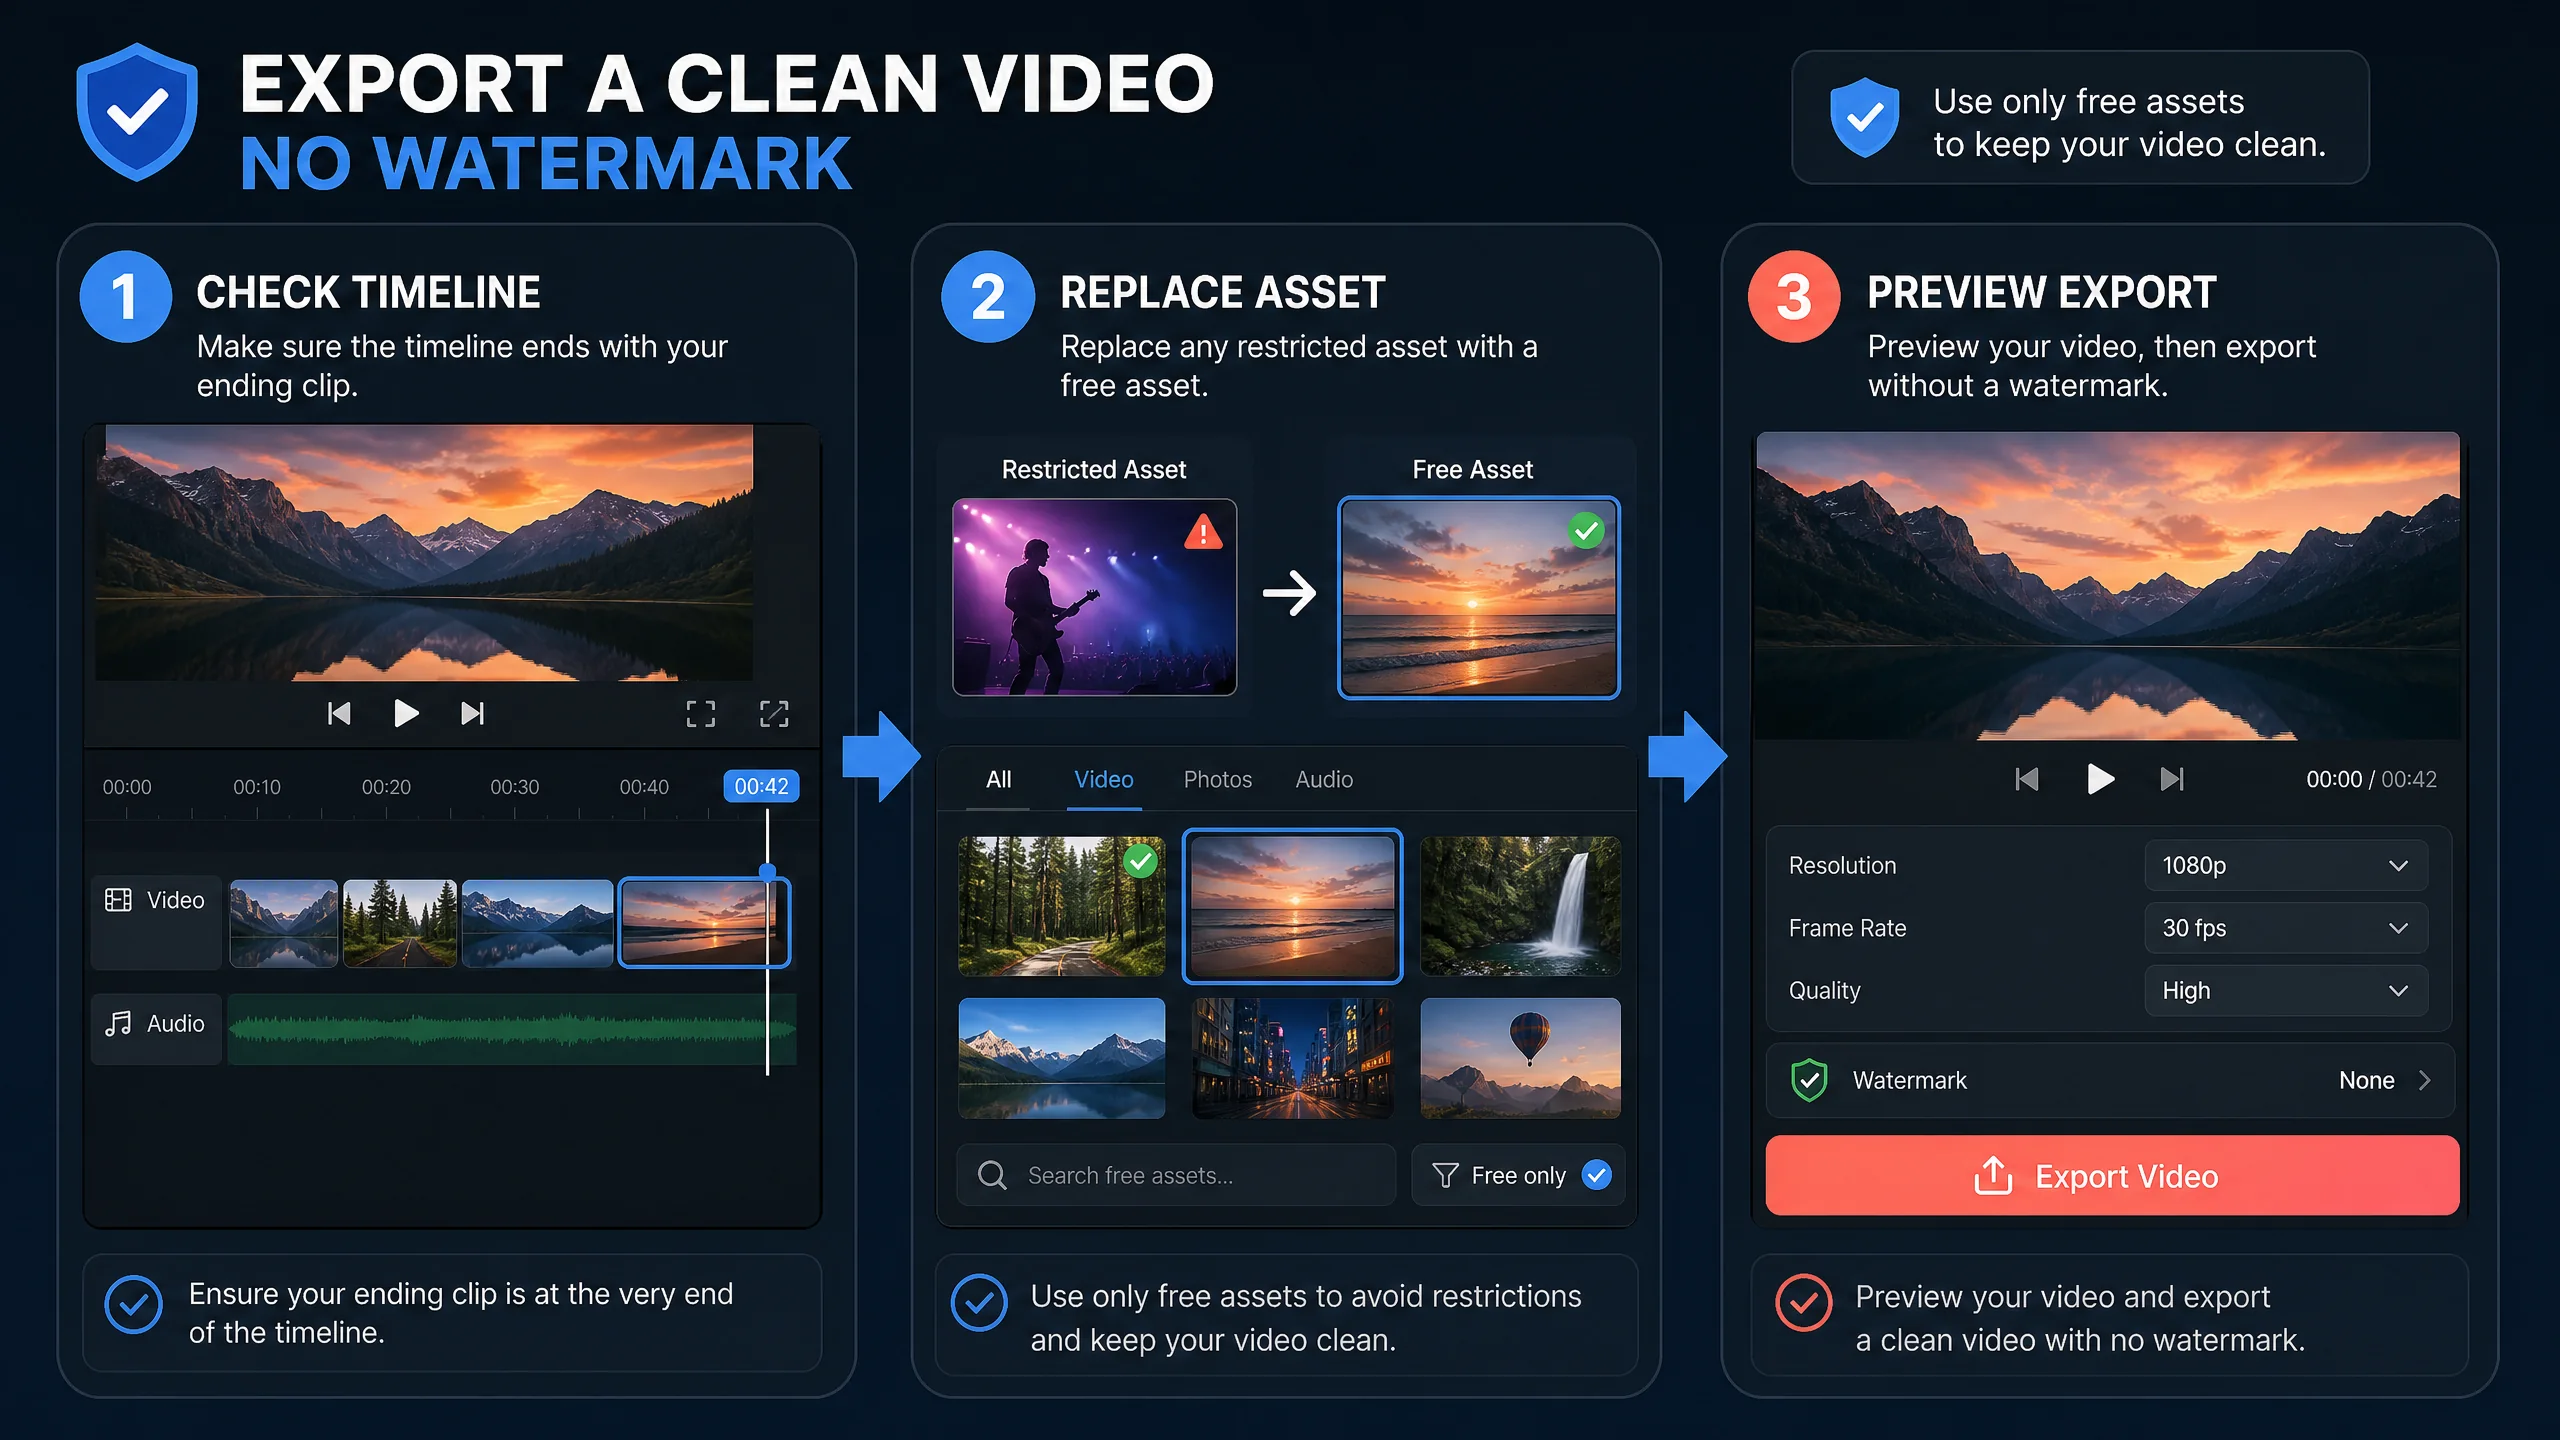
CapCut’s official help guidance lists removing the default ending clip as one route to a watermark-free export.[1] The control can move between app versions, so look for the separate ending segment rather than deleting the final part of your actual footage.
If the watermark appears after using a template, inspect the template’s elements before exporting. Look for locked effects, stickers, transitions, stock material or an export option that is marked Pro. Replace restricted elements with free alternatives when possible. If the project depends on a premium template or effect, the correct solution may be an active CapCut Pro account rather than an unofficial remover or modified app.
CapCut’s official help page explains that standard editing with your own clips, text, music and effects can avoid template-specific watermark behavior.[1] Start a normal project, add your own media and build the timeline manually. This takes longer than a template, but it makes it easier to see which element is affecting the export.
If a logo, text, or a digital watermark is already embedded in a video you recorded or own, you can review legitimate editing options such as cropping, covering it with your own design or using an available removal tool. Results can vary with motion and background detail. Keep the original file, preview the result at full size and avoid claiming ownership of footage that belongs to another creator.
No single plan statement should be treated as a guarantee for every project. CapCut says watermark-free export depends on the features used and the current app version. Pro access can help with premium templates, effects or assets, but you should still inspect the timeline and export settings. If a watermark remains after the correct account is active, contact official CapCut support with a redacted screenshot that does not expose personal information or login codes.
Review the available BuyCutPro plans and confirm the account identity before checkout. BuyCutPro is an independent seller site and is not the official CapCut website.
Compare available plans →References: CapCut’s watermark-free export help [1]; CapCut no-watermark guide [2]. BuyCutPro is an independent website and is not the official CapCut website.
Stop struggling with free version limits. Get private access to CapCut Pro today.
View Private Plans →Senior Video Editor & Founder of BuyCutPro. Helping Indian creators optimize post-production workflows.
Connect on LinkedIn
Use the right account method and fix common access problems without sharing sensitive credentials.
Read guide →
A focused troubleshooting checklist for missing codes, failed scans and wrong accounts.
Read guide →
Stop the retry loop and use a cleaner account, network and device checklist.
Read guide →
A beginner-friendly workflow for creating, editing and checking feature access.
Read guide →